
Welcome to the ultimate guide to the gold standard of cryptocurrency security: the hardware wallet. If you are serious about self-custody—the principle of being your own bank—a hardware wallet is the most critical tool you will own. It represents the point on the custody continuum where you take full, uncompromising control over your digital assets.
For newcomers, the concept can seem intimidating. How can a small, offline device hold massive amounts of value? And if it's offline (or "cold"), how can you safely connect it to the internet and interact with decentralized applications (DApps) like exchanges or lending protocols?
This deep dive will demystify the technology inside these devices, explaining how they technically sign transactions, how they are protected against physical and digital attacks, and, most importantly, provide a step-by-step framework for using them safely in the Web3 world without risking your private keys. Understanding the core mechanisms is the first step toward achieving true financial sovereignty.
The Core Concept: Why Cold Storage Matters
In the world of cryptocurrency, security is a race against time. Software wallets (often called "hot wallets") are connected to the internet and run on general-purpose computers or phones. While convenient, they are inherently vulnerable to malware, phishing, and remote attacks because your private key is accessible to the operating system.
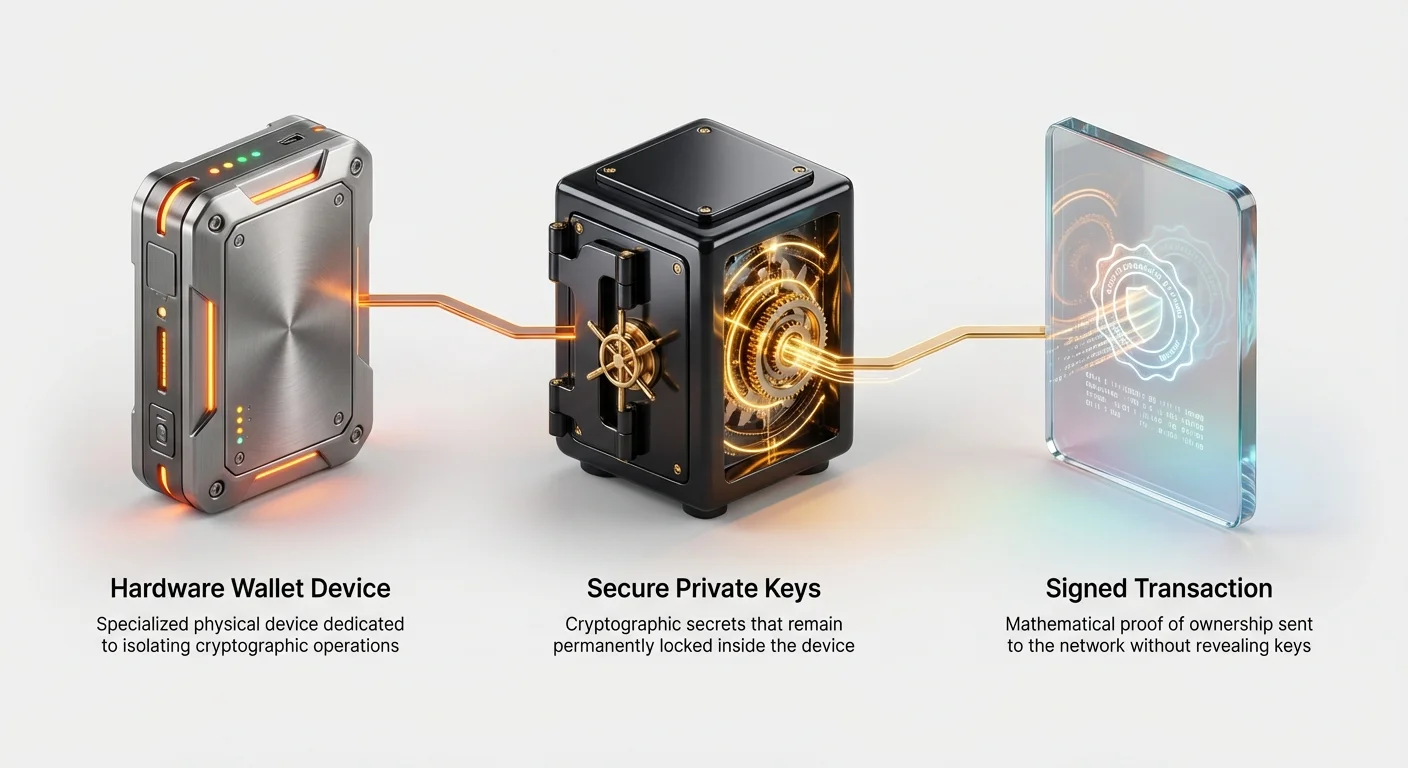
Hardware wallets solve this fundamental problem by creating an "air gap" between your sensitive cryptographic secrets and the potentially hostile internet environment. They are dedicated, purpose-built computers designed for one thing: securely storing and signing transactions.
Defining the Digital Vault
A hardware wallet functions as a digital vault. When you initialize the device, it generates your unique seed phrase (a series of 12 or 24 words). This seed phrase is mathematically linked to all your private keys and is never, under any circumstances, exposed to the computer, phone, or internet it is connected to.
The key security principle is that the private key never leaves the device's secure internal memory. When you want to send funds or interact with a DApp, the hardware wallet doesn't export the key; instead, it uses the key internally to perform the necessary cryptographic function—a process known as signing.
The Self-Custody Mandate
Moving from storing funds on an exchange (where the exchange holds the keys, known as custodial storage) to using a hardware wallet is a massive shift in responsibility. This shift is the essence of self-custody.
While exchanges offer convenience, they introduce counterparty risk—the risk that the exchange could be hacked, freeze funds, or collapse. By using a hardware wallet, you eliminate counterparty risk for storage, making you the sole guardian of your wealth. This means you must also take full responsibility for securing your seed phrase and ensuring the physical integrity of your device.
Anatomy of a Hardware Wallet: The Technical Engine
Unlike a typical thumb drive or a smartphone, a hardware wallet is engineered specifically for cryptographic security. Understanding the components helps explain why these devices are so effective at protecting highly valuable data.
The Secure Element (SE): The Key Fortress
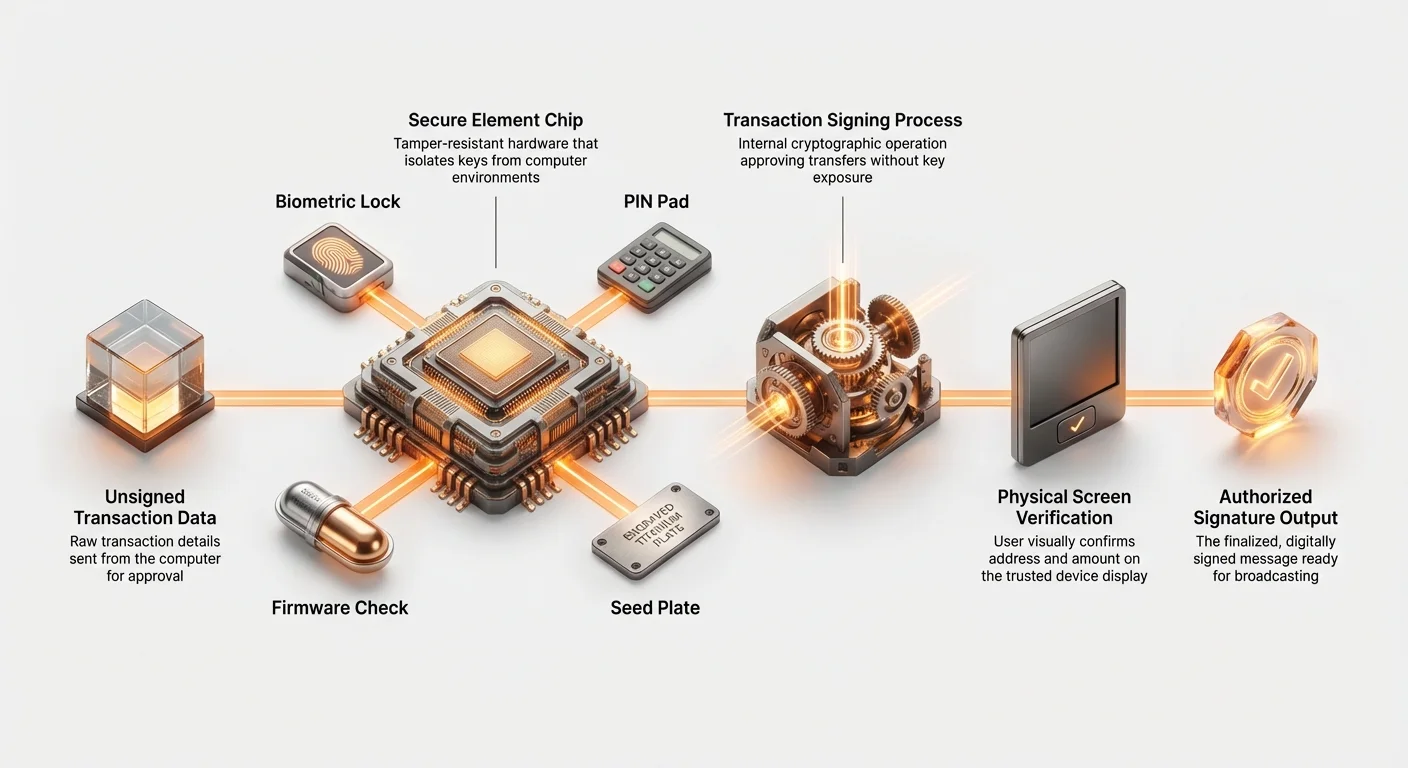
The most crucial component of a modern, high-security hardware wallet is the Secure Element (SE). This is a specialized, tamper-resistant microcontroller chip designed to isolate and protect cryptographic operations. Think of it as a black box designed to resist physical penetration attempts, such as microscopic side-channel attacks (analyzing power consumption to guess the key) or voltage manipulation.
The SE performs several key functions:
- Key Generation: It generates the seed phrase and private keys in a highly secure, non-deterministic environment.
- Encrypted Storage: It stores the seed phrase and private keys behind a PIN code, isolated from the general processing unit.
- Cryptographic Signing: It is the only component that ever touches the private key to sign a transaction.
Once a key is generated inside the SE, it is virtually impossible to extract it without physically destroying the chip and its complex layers of physical security.
Firmware Integrity and Verification
Every hardware wallet runs operating software known as firmware. If a malicious attacker could replace the legitimate firmware with their own, they could potentially steal your keys when you enter your PIN or generate a new transaction.
To prevent this, hardware wallets implement rigorous integrity checks:
- Secure Boot: When the device powers on, it verifies that the operating firmware has not been modified using cryptographic signatures from the manufacturer. If the signature doesn't match, the device often displays a warning or refuses to boot.
- Manufacturer Attestation: High-end wallets use a process called attestation, which allows the user (or the companion desktop application) to cryptographically verify that the specific chip inside the device is genuine and running the authorized firmware version. This is a critical defense against sophisticated "middleman" attacks during manufacturing or shipping.
The Signing Ceremony: How Transactions are Approved
The fundamental misunderstanding many beginners have is that when they connect their hardware wallet to their computer, their private key is somehow transferred to the computer to complete a transaction. This is false. The key stays locked inside the SE.
The process of sending cryptocurrency involves a "signing ceremony," a multi-step sequence that ensures user intent is verified on the secure hardware device itself.
The Core Difference: Signing vs. Storage
In simple terms:
- Storage: The private key remains in the hardware wallet's secure chip, protected by the PIN.
- Signing: The hardware wallet uses that private key internally to digitally endorse an unsigned transaction message, proving ownership without revealing the key.
A signature is essentially mathematical proof that the owner of the funds has authorized the transfer.
Step-by-Step Transaction Flow
Imagine you want to send 1 BTC to a friend:
- Preparation (Host Computer): You open your software wallet application (e.g., MetaMask, Electrum, or the manufacturer’s native app) and create a transaction request specifying the amount (1 BTC) and the recipient's address. At this point, the transaction is just data; it is unsigned and invalid.
- Transmission (USB/Bluetooth): The unsigned transaction data is securely sent over the connection cable (USB) to the hardware wallet.
- Verification (Hardware Wallet Screen): The hardware wallet receives the data and displays the critical details on its tiny, dedicated screen (Address, Amount, and Fees). This step is the most critical security checkpoint. Since the screen is physically controlled by the secure element, malware on your computer cannot tamper with the details shown here.
- Authorization (User Input): You physically press the button(s) on the hardware wallet to confirm the details displayed on the screen.
- Signing (Internal Process): Only after you approve does the Secure Element use the internal private key to sign the transaction mathematically.
- Broadcast (Host Computer): The newly signed transaction is sent back to your computer. The computer’s software then broadcasts this valid, signed transaction to the decentralized blockchain network.
If your computer is infected with malware that tries to change the recipient address, the hardware wallet's screen will display the malicious address, allowing you to reject the transaction before it is signed.
Architecture Deep Dive: Secure Element vs. General Purpose Chip
When choosing a hardware wallet, users often encounter debates regarding the underlying chip architecture. The two main approaches involve relying on highly certified, closed-source Secure Elements (SEs) or leveraging open-source, general-purpose microcontrollers. Both offer different trade-offs in terms of auditability and physical security.
Secure Element (SE) Architecture
SEs (often found in popular banking cards and passports) are the gold standard for resisting physical tampering. They are designed and certified by third-party bodies (like Common Criteria or FIPS) to be highly resistant to invasive attacks like probing or fault injection.
Pros:
- High Physical Resistance: Superior protection against highly funded, sophisticated attackers attempting to extract keys directly from the silicon.
- Industry Standard: Verified and tested for decades in the finance and security sectors.
Cons:
- Closed Source: The internal workings (the mask and specific code running on the chip) are proprietary and cannot be fully audited by the public, requiring users to place trust in the manufacturer.
General Purpose Chip (GPC) with Open Source Implementation
Some manufacturers choose to rely on standard, widely available microcontrollers (General Purpose Chips) but pair them with completely open-source firmware.
Pros:
- Full Transparency: The entire code base is auditable by the global developer community. Many believe "open source" is superior because vulnerabilities can theoretically be spotted and patched quickly.
- Flexibility: Easier to update and iterate on security features.
Cons:
- Lower Physical Resistance: GPCs are not specifically hardened against invasive physical attacks in the way SEs are. If an attacker gains physical access and time, they might exploit weaknesses in the chip itself.
The Hybrid Approach: Some modern wallets attempt to blend these by using a GPC for the main operating system while storing the most sensitive seed material on a separate, extremely robust, but still proprietary, Secure Element. This aims to gain the best of both worlds: open-source transparency for daily operations and high physical security for the crucial private key storage.
Mitigating External Threats: Supply Chain Attacks
While hardware wallets are highly secure against remote hackers, a successful attack often targets the weakest link: the moment the device is purchased or received. A supply chain attack occurs when a device is compromised before it reaches the legitimate user.
What is a Supply Chain Attack?
In the context of hardware wallets, a supply chain attack involves an attacker (or a malicious insider) inserting malware, physically tampering with the chip, or placing a pre-written, compromised seed phrase into the packaging during manufacturing, shipping, or distribution.
Example Scenario: An attacker intercepts a package, opens it subtly, replaces the genuine device with an identical-looking device loaded with custom firmware designed to record your PIN, or, more simply, places a scratch card that already has a seed phrase written on it.
Verification Checklist for New Devices
You must treat the arrival of a new hardware wallet with extreme skepticism. Follow these mandatory steps to mitigate supply chain risk:
- Purchase Directly from the Manufacturer: Always buy your hardware wallet directly from the official manufacturer's website. Avoid third-party resellers (like Amazon or eBay), as they are far more vulnerable to unauthorized repackaging and tampering.
- Inspect the Packaging for Tamper Seals: Check every seal, holographic sticker, or specialized wrapping. Manufacturers spend significant effort making their packaging tamper-evident. If the packaging looks altered, torn, or unprofessional, refuse the delivery or return the device immediately.
- Crucially: Never Use a Pre-Generated Seed Phrase: A genuine hardware wallet never comes with a pre-printed recovery seed. You must generate the seed phrase on the device itself during the initial setup process. If your device prompts you to use a seed phrase already printed on a card included in the box, it is compromised. Immediately discard the device.
- Perform Factory Reset and Firmware Verification: Connect the device, run the factory reset function, and ensure you are running the latest official firmware downloaded through the manufacturer's companion application. This verifies the software integrity.
Connecting Safely to the Hot Web: DApps and WalletConnect
This is where the fear often sets in for novices: How can I safely use my "cold" wallet to interact with a "hot" decentralized exchange (DEX) or NFT marketplace? The answer lies in the principle of separation of duties. Your hardware wallet handles the keys; your computer handles the interface.
The Principle of Least Privilege
When you connect a hardware wallet to a DApp (via an intermediary like MetaMask or WalletConnect), you are not granting the DApp or your browser access to your private key. You are only establishing a communication channel.
The hardware wallet retains the "least privilege"—it only has the ability to sign specific messages presented to it, and that signing power requires physical user confirmation (pressing the buttons).
Integrating with MetaMask and Other Hot Wallets
Most modern hardware wallets integrate seamlessly with popular software interfaces like MetaMask, allowing you to use your cold storage for routine Web3 interaction.
- Connect the Hardware Device: Plug in your hardware wallet and unlock it with your PIN.
- Connect in Software: In MetaMask (or similar interface), select the option to "Connect Hardware Wallet."
- Account Sync: MetaMask reads the public keys (addresses) from your hardware wallet. Your hardware-secured accounts appear as if they were standard MetaMask accounts, but they are clearly labeled as "Hardware."
- Transaction Initiation: When you initiate a swap or a deposit on a DApp, MetaMask creates the unsigned transaction and relays it to the connected hardware device.
- Final Verification: The transaction appears on your hardware wallet’s screen. You must verify the contract address, the transaction method (e.g., approve or swap), and the amount on the hardware screen itself. If the details on the computer screen do not match the details on the hardware screen, reject the transaction.
WalletConnect Security Best Practices
WalletConnect V2 is a popular, encrypted protocol used to connect mobile wallets (which often secure hardware wallet keys) to desktop DApps. Even though the channel is encrypted, the user must still be vigilant:
- Review Permissions Carefully: When a DApp requests connection via WalletConnect, it asks for specific permissions (e.g., permission to view your address). Always review these, but understand that the most crucial security feature is the transaction verification step.
- Verify Everything on the Device: Never rely solely on the browser pop-up. If you are interacting with a complex smart contract (e.g., approving unlimited token spending), the full details must be scrutinized on the small, trusted screen of the hardware device before you hit 'confirm.'
- For further details on secure connection methods, refer to our dedicated guide: WalletConnect V2 Security Audit and Best Practices for DApp Interaction.
Connectivity Risks: USB vs. Bluetooth and Physical Security
While the core of the hardware wallet is its isolation, the methods used to connect it to the internet environment introduce varying degrees of risk and trade-offs.
USB Connection Security
The standard method of connection is a direct USB cable. This is generally the most secure and recommended method for high-value transactions.
Why USB is Preferred:
- Minimized Attack Surface: The connection is physical and temporary. The data transfer is usually limited to transaction requests and signed outputs, often leveraging specialized, hardened USB protocols specific to the device.
- Reliable Isolation: Because there is no radio frequency (RF) component, the device is fully 'cold' when unplugged, reducing the complexity of the security model.
Bluetooth and Radio Frequency Risks
Some modern hardware wallets offer Bluetooth connectivity for added convenience, particularly when interacting with mobile phones.
Trade-offs of Wireless Connectivity:
- Convenience vs. Risk: Bluetooth allows transactions without needing a cable, which is very convenient for mobile users. However, it expands the device's attack surface.
- Pairing and Encryption: Wireless connections must rely on robust encryption and pairing protocols (often involving temporary passwords or QR code validation) to prevent an attacker from intercepting or injecting malicious unsigned transactions into the data stream.
- Best Practice: If your device supports Bluetooth, keep the feature disabled (or only enabled when actively necessary) to maintain maximum isolation. Use USB for major transfers and initial setup.
The Crucial Role of Physical PIN and Passphrases
Your hardware wallet is only secure if it’s physically protected by robust access controls.
- The PIN: The PIN protects the device from unauthorized use if it falls into the wrong hands. After a certain number of failed attempts (usually three), the device will self-wipe, requiring the user to restore their funds using the seed phrase.
- The Passphrase (The 25th Word): Some advanced users add an optional 25th word (or passphrase) to their standard 12/24-word seed phrase. This 25th word creates a separate, cryptographically distinct wallet. If someone found or compromised your 12/24-word seed phrase (but not the passphrase), they would only access an empty or decoy wallet. The real funds are only accessible if the user enters the standard seed plus the secret passphrase. This adds an extraordinary layer of plausible deniability and security, but requires flawless memorization or storage of that 25th word.
Conclusion: The Path to Secure Sovereignty
A hardware wallet is not merely a storage device; it is a declaration of self-sovereignty. By understanding the core technologies—the non-extractable keys in the Secure Element, the necessity of firmware integrity checks, and the critical step of verifying every transaction on the device's trusted screen—you can move beyond basic security and confidently manage your digital assets.
The biggest mistake novices make is thinking that connecting a hardware wallet risks exposing the private key. This deep dive should clarify that the hardware wallet is designed specifically to prevent that exposure. It acts as an unbreakable firewall, allowing the signed proof of ownership to leave, but ensuring the key itself remains physically isolated.
Always remember the golden rules: purchase directly from the manufacturer, never use a pre-set seed phrase, and rigorously verify the transaction details on the device's screen before hitting 'confirm.' By adhering to these practices, you harness the power of cold storage while safely navigating the exciting, yet risky, landscape of Web3.