
Navigating the world of decentralized finance (DeFi) offers incredible freedom and opportunity, but interacting with Decentralized Exchanges (DEXs) efficiently requires more than just clicking a "Swap" button. While the interface might look simple, every swap you execute is a complex transaction subject to volatile market conditions, network congestion, and technological risks.
For beginners, a successful swap is one that executes. For advanced traders, a successful swap is one that executes at the best possible price and for the lowest reasonable cost. The difference between these two approaches can save you hundreds or thousands of dollars over time.
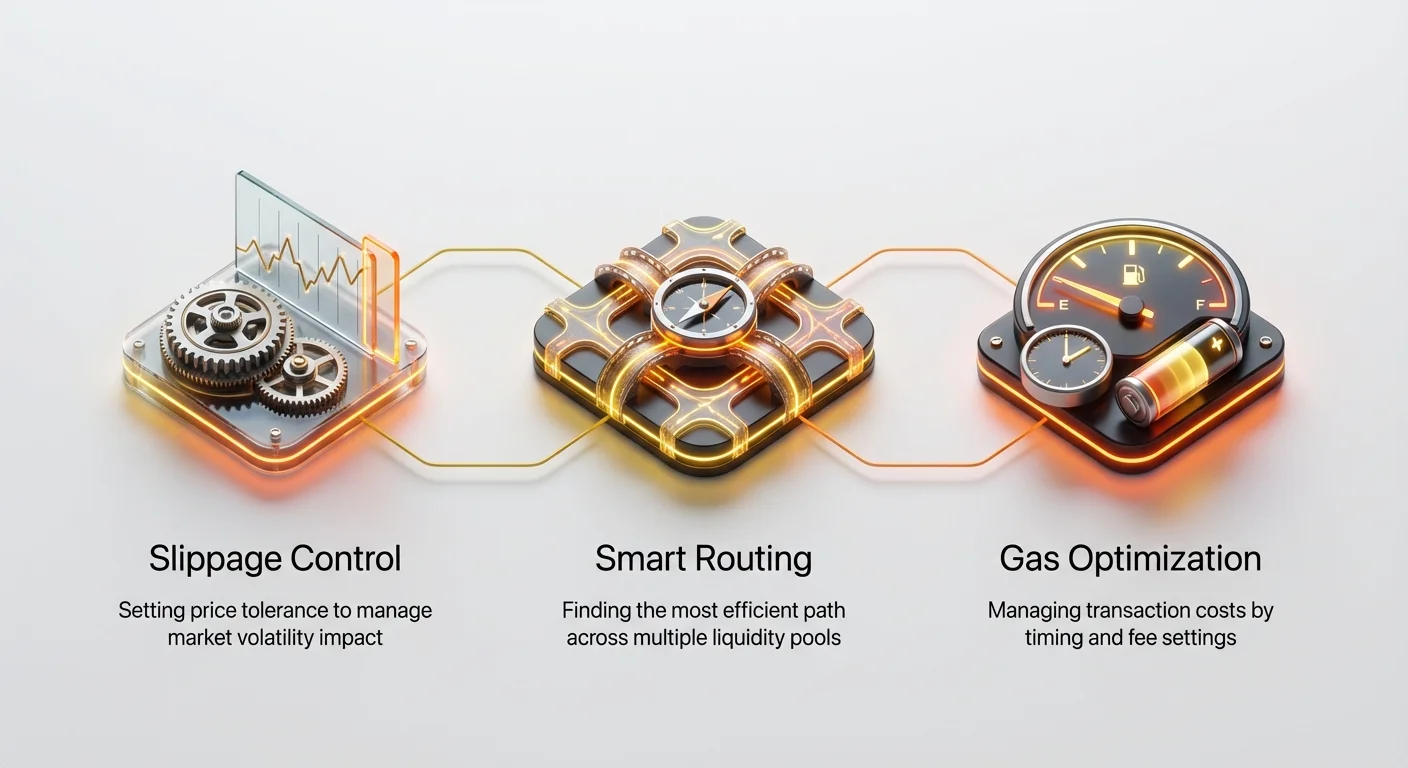
This comprehensive guide is designed to transform you from a basic DEX user into an efficient, sophisticated DeFi trader. We will move beyond the basics of Automated Market Makers (AMMs) and dive deep into the actionable strategies required to manage price risks (slippage), ensure optimal execution (routing), and minimize transactional fees (gas optimization). By mastering these three elements, you gain significant control over your digital asset transactions.
Understanding Decentralized Exchanges (DEX) Mechanics
Before optimizing swaps, it is essential to understand the underlying infrastructure that processes them. Unlike traditional banks or centralized exchanges (CEXs), DEXs operate without intermediaries, relying instead on automated code called smart contracts.
How Swaps Work: The Role of Liquidity Pools
DEXs like Uniswap or SushiSwap do not rely on traditional order books where buyers and sellers meet directly. Instead, they use a system of Liquidity Pools.
A liquidity pool is simply a smart contract holding a pair of crypto assets (e.g., ETH and USDC). Users known as liquidity providers deposit these assets, earning a small fee for facilitating trades.
When you execute a swap (e.g., exchanging ETH for USDC), you are essentially interacting with this pool. You deposit one asset (ETH), and the smart contract calculates how much of the other asset (USDC) to give you in return, based on a mathematical formula (the Constant Product Formula, $x * y = k$). The resulting price is determined entirely by the ratio of assets left in the pool after your trade.
The Cost of Doing Business: Trading Fees vs. Gas Fees
When swapping on a DEX, you face two primary categories of costs:
- Trading Fees (Protocol Fees): This fee is taken by the DEX protocol (typically 0.1% to 0.3%) and is paid to the liquidity providers (LPs) who supply the tokens in the pool. This fee is non-negotiable and baked into the price of the trade.
- Gas Fees (Network Fees): This is the computational cost required to process your transaction on the underlying blockchain (like Ethereum or Solana). Gas is paid to the network validators or miners. This cost is highly variable, depends on network congestion, and is the primary area where optimization strategies can save you money.
Mastering Slippage: Protecting Your Trade Value
Slippage is the single most common cause of failed transactions and unexpected losses for new DEX users. Understanding and correctly managing slippage tolerance is the cornerstone of efficient swapping.
Defining Slippage Tolerance
Slippage is the difference between the expected price of a trade when you submit it, and the actual price you receive when the transaction is confirmed on the blockchain.
Slippage occurs primarily because crypto prices are always moving, and because your trade itself changes the supply/demand ratio within the liquidity pool, causing the price to shift.
- Positive Slippage: You receive slightly more of the token than expected (rare, but happens if a large buy order executes just before yours).
- Negative Slippage (Price Impact): You receive slightly less of the token than expected (the most common scenario).
Your DEX interface requires you to set a Slippage Tolerance, expressed as a percentage. This setting tells the smart contract the maximum price degradation you are willing to accept before the transaction fails.
Example: You submit a swap to buy 1,000 WETH at $3,000 per WETH. If your slippage tolerance is set to 1%, the contract will only execute the trade if the final realized price is $3,030 or less. If the price spikes to $3,031 before the transaction confirms, the swap automatically fails, protecting you from a bad trade.
The Trade-off: Tolerance vs. Failed Transactions
Setting the slippage tolerance involves a crucial balancing act:
- High Tolerance (e.g., 5%): Your trade is highly likely to succeed, but you risk getting a much worse price than expected. This is generally only used for very volatile or illiquid assets.
- Low Tolerance (e.g., 0.1%): You protect yourself from large price swings, but your transaction is much more likely to fail, especially on busy networks or for large orders. Failed transactions still consume gas fees, meaning you pay for nothing.
Strategies for Mitigating Slippage Risk
To optimize your slippage setting, follow these practical steps:
1. Analyze Liquidity and Size
The amount of slippage you experience is directly related to the size of your order relative to the size of the liquidity pool.
- Deep Pools (High Liquidity): Swapping highly traded assets (like ETH/USDC) where pools hold millions of dollars requires low slippage tolerance (0.1% to 0.5%).
- Shallow Pools (Low Liquidity): Swapping new or niche tokens requires higher tolerance (1% to 3%) because even a small order will cause significant price impact.
2. Utilize Just-in-Time (JIT) Adjustment
For stable pairs (like USDC/DAI), the default 0.5% tolerance is often too high. Experienced traders try a very low setting first:
- Start by setting slippage to the minimum possible (often 0.1%).
- If the transaction fails, increment the tolerance slowly (e.g., try 0.2%, then 0.5%).
- Exception: When swapping extremely volatile meme coins or low-cap tokens, you may need to use 5% or even higher, but proceed with extreme caution.
3. Split Large Orders
If your trade volume represents more than 5% of the total liquidity in a pool, you will face severe price impact. The solution is to break one large swap into several smaller swaps executed over time, or, better yet, utilize a DEX Aggregator (discussed next). Splitting trades reduces individual price impact, although it increases the overall gas costs since each swap requires a fee.
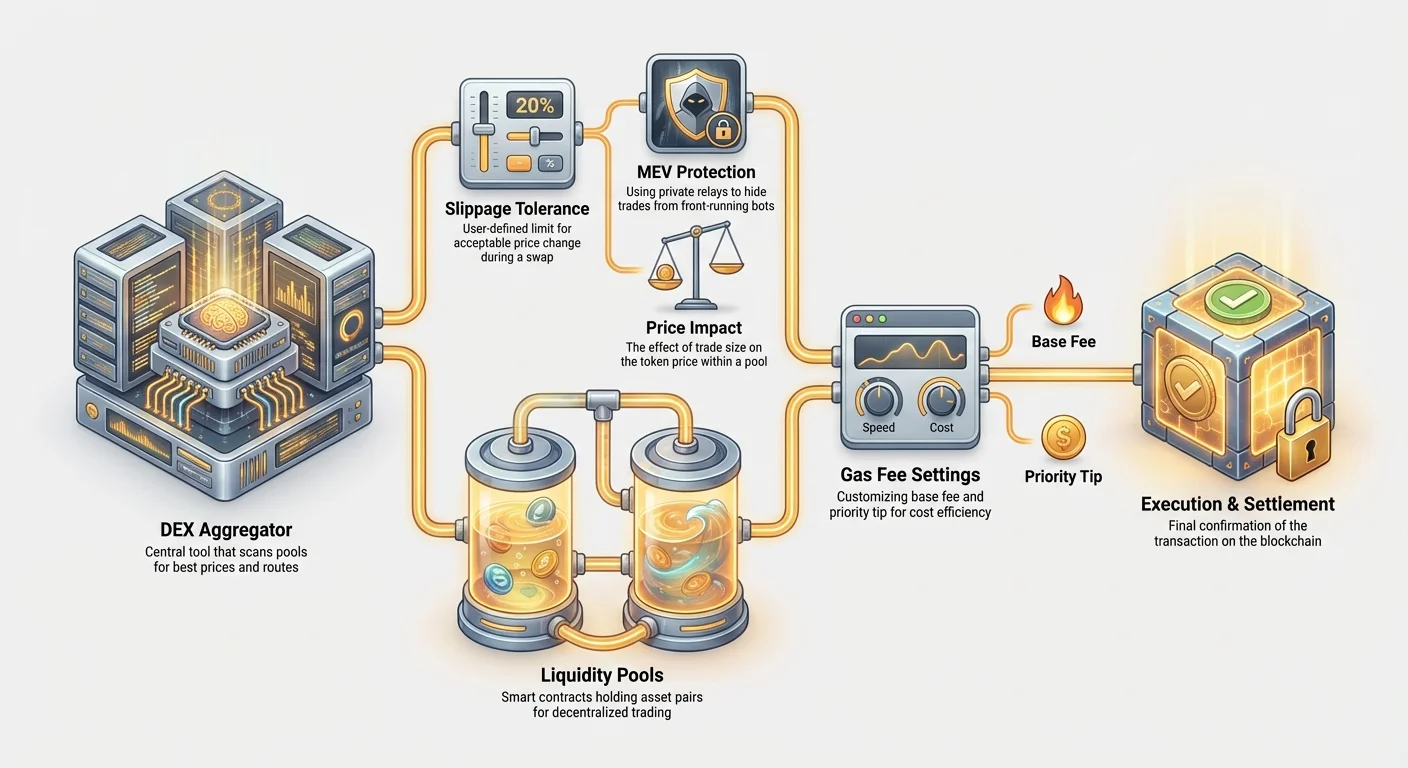
Finding the Best Path: DEX Routing and Aggregators
When you swap Token A for Token B, you might assume you are using the most direct and efficient liquidity pool available. In the complex landscape of DeFi, this is rarely the case. Optimal execution requires smart routing.
Why Your Swap Might Need Multiple Steps
Sometimes, the best price for swapping ETH for a niche token (Token X) is not found in the direct ETH/X pool. Instead, the most efficient route might be:
ETH → USDC → DAI → Token X
This multi-step process leverages pools with higher liquidity at different stages, resulting in a significantly better final price, even after accounting for the slight increase in trading fees for multiple steps.
The Power of DEX Aggregators (The 'Google Maps' of Crypto)
Manually routing swaps across dozens of DEXs would be impossible. This is where DEX Aggregators come in.
A DEX aggregator is a tool (like 1inch or Paraswap) that acts as the "Google Maps" of decentralized trading. When you input a swap, the aggregator scans all available liquidity pools across dozens of DEXs (Uniswap, Sushiswap, Curve, etc.) and analyzes thousands of potential routes to determine the single most capital-efficient path.
Key Benefits of Using Aggregators:
- Best Price Discovery: Always ensures you get the maximum output for your input, often finding fractional savings that add up rapidly.
- Liquidity Splitting: If no single pool can handle your large order without massive slippage, the aggregator will automatically split your order across multiple pools and protocols (e.g., 30% on Uniswap, 70% on Balancer) to minimize price impact.
- Simplified Interface: You only interact with the aggregator's smart contract, simplifying a multi-step trade into a single transaction.
Actionable Tip: For any trade over $1,000, or for trades involving tokens with moderate liquidity, always use a DEX aggregator instead of swapping directly on a single DEX protocol.
Router Efficiency and Gas Costs
While aggregators optimize the price you receive, their complex routing sometimes requires more computational steps, which can slightly increase the initial gas cost compared to a simple, direct swap.
- Low-Value Swaps (Under $100): If the potential price improvement offered by an aggregator is less than the increased gas cost, a direct swap on the highest-liquidity DEX might be more gas-efficient.
- High-Value Swaps (Over $1,000): The price improvement gained from efficient routing almost always outweighs the marginal increase in gas fees. The net result is a significantly cheaper overall trade.
Managing Hidden Risks: Front-Running and MEV
Once you submit a transaction to the blockchain, it enters the mempool (a waiting area for unconfirmed transactions). In the mempool, your transaction details—including the exact amount, token pair, and intended action—are publicly visible. This visibility opens the door to a sophisticated risk known as Maximal Extractable Value (MEV).
What is Maximal Extractable Value (MEV)?
MEV refers to the maximum value that can be extracted from block production through the insertion, exclusion, and reordering of transactions within a block. Essentially, MEV is the profit derived from observing and manipulating the public queue of transactions.
The most common method of MEV that directly impacts swappers is front-running.
How Front-Running Affects Your Swaps
Front-running occurs when an automated bot detects a large, profitable swap sitting in the mempool. Since your large swap is likely to cause price impact (moving the price up or down), the bot executes a strategy to profit from this predictable movement:
- Bot sees your transaction (Transaction B): The bot notices you are buying 10,000 units of Token X, which will push the price up 5%.
- Bot executes its own small buy (Transaction A): The bot quickly submits a small buy order for Token X with a higher gas fee than yours, ensuring its transaction is confirmed immediately before yours.
- Your transaction executes (Transaction B): Your large buy executes, pushing the price up 5%.
- Bot sells (Transaction C): The bot immediately executes a sell order for its small amount of Token X, profiting from the price difference caused by your trade.
The result for you is two-fold: you experience higher slippage, and the price of the asset is marginally higher than it would have been had the bot not interfered.
Practical Steps to Reduce MEV Exposure
Protecting yourself from front-running requires using specialized tools that shield your transaction details from the public mempool:
1. Use Private Transaction Relays
Many popular wallets and some DEX aggregators now integrate with private relay services (like Flashbots).
Instead of broadcasting your transaction to the public mempool, these services send your transaction directly and privately to a block builder. The block builder confirms that your transaction is valid and includes it directly into the next block without ever letting it appear publicly.
- Benefit: By avoiding the mempool, MEV bots cannot see and front-run your order.
2. Minimize Slippage Tolerance
While low slippage tolerance increases the chance of a failed trade, it also makes front-running less profitable for the bots. If your tolerance is very tight (e.g., 0.1%), the bot has minimal margin for profit, making the attempt economically unviable. Using a tighter tolerance acts as a deterrent.
3. Use Aggregators with MEV Protection
Many leading DEX aggregators now default to using private transaction paths or implement "anti-MEV" logic directly into their smart contracts. When choosing an aggregator, look for platforms that explicitly market their MEV mitigation features.
Optimizing Gas: Efficiency in a High-Fee Environment
Gas fees are the necessary cost of using a decentralized, secure, and permissionless network. On major chains like Ethereum, gas costs can often exceed the value of the trade itself, making gas optimization a critical skill.
Gas, Gwei, and Transaction Limits: Deconstructed
To optimize gas, you must first understand the three components that determine your final transaction cost:
| Component | Definition | Impact on Cost |
|---|---|---|
| Gas Unit (or Gas Limit) | The maximum amount of computational effort required for your transaction. Complex actions (like routing through an aggregator) require more gas units. | Determines the complexity cost. |
| Gas Price (Measured in Gwei) | The price you are willing to pay for each unit of gas. This is often called the "Priority Fee" or "Tip" under the new EIP-1559 model. | Determines the speed cost. Higher price = faster confirmation. |
| Total Gas Fee | (Gas Units Used) x (Gas Price per Unit) | Your final cost. |
Gwei is simply a denomination of Ether (ETH), much like a penny is a denomination of a dollar. 1 Gwei = 0.000000001 ETH.
The EIP-1559 Model: Base Fee and Priority Fee (Tip)
In 2021, Ethereum implemented EIP-1559 to make gas fees more predictable. This model splits the gas cost into two parts:
1. Base Fee (Required, Burned)
The Base Fee is dynamically calculated by the network based on current demand. This fee is mandatory, and crucially, it is burned (removed from circulation), which helps manage Ethereum’s supply. You cannot set the Base Fee; it is fixed by the network at the time of the block.
2. Priority Fee (Optional, Tip)
The Priority Fee (or Miner Tip) is an optional amount you offer to the validator/miner. This acts as an incentive to include your transaction quickly. If you want faster confirmation during high congestion, you increase your Priority Fee.
The Max Fee Setting
When submitting a transaction, you set a Max Fee. This is the maximum total amount (Base Fee + Priority Fee) you are willing to pay. If the required Base Fee exceeds your Max Fee, the transaction will not go through.
Strategies for Customizing Gas Settings
Relying on the default "fast" setting in your wallet is often expensive. Here is how to take control:
1. Set an Appropriate Gas Limit (Safety First)
When interacting with complex smart contracts (like swaps), the wallet usually estimates the required Gas Limit. Do not significantly lower the Gas Limit. If your transaction runs out of gas mid-execution, it fails, and you still lose all the gas consumed up to that point.
- Best Practice: Use the wallet’s estimate or slightly increase it (by 10-20%) as a safety buffer, especially for complex aggregator swaps.
2. Adjusting the Priority Fee (For Speed)
If the network is highly congested (e.g., during a major token launch or NFT mint), you may need to increase the Priority Fee to ensure quick confirmation.
If the network is quiet, you can lower the Priority Fee significantly (sometimes to just 1 Gwei) because the Base Fee is low enough on its own to incentivize validators to include your transaction.
3. Utilizing Gas Trackers
Never guess the current gas price. Always use a reliable gas tracking service (like Etherscan’s Gas Tracker or a wallet’s built-in tool) to see the live estimate for fast, standard, and slow transactions.
- If you are in no hurry, choose the "slow" setting, which often uses a lower Max Fee and Priority Fee.
Timing Your Transactions for Lower Fees
The easiest way to reduce gas cost is to choose the right time to transact. Network congestion follows predictable patterns based on user activity across time zones.
- Avoid US Trading Hours (9:00 AM – 5:00 PM EST): This is generally the most expensive time of the day, as most major traders and institutions are active.
- Target Off-Peak Times: The cheapest times for gas are typically:
- Late Night/Early Morning (2:00 AM – 6:00 AM EST).
- Weekends (Saturday and Sunday). Demand typically dips when institutional traders are less active.
By timing a non-urgent swap to a weekend morning, you can often save 30% to 70% on gas fees compared to a weekday afternoon.
Best Practices Checklist for Advanced Swapping
Becoming an optimized DEX trader means integrating all these strategies into a seamless workflow. Use this checklist before submitting any significant decentralized swap:
| Optimization Area | Actionable Checklist Item | Rationale |
|---|---|---|
| Price & Routing | Use a DEX Aggregator. Never swap directly on a single DEX for high-value trades. | Ensures access to the deepest liquidity and optimal routing across all protocols. |
| Slippage Control | Analyze Liquidity. Check the pool size relative to your trade size. | Determine if the default 0.5% tolerance is too high or too low. |
| Slippage Control | Set Low Tolerance (0.1%-0.5%) first. Only increase if the transaction fails due to price movement. | Protects against negative slippage and discourages front-running. |
| Risk Mitigation | Enable Private Transaction Mode. Use Flashbots or similar MEV protection if available in your wallet or aggregator. | Prevents your transaction from being front-run by arbitrage bots. |
| Gas Optimization | Check Gas Tracker. Verify current network conditions (Gwei price). | Avoid swapping during peak congestion (weekday afternoons). |
| Gas Optimization | Customize Gas Limits (Max Fee). Set a reasonable ceiling to avoid overpaying. | Gives you control over the absolute maximum you will spend if the Base Fee spikes. |
| Post-Trade | Verify Receipt. Confirm the amount received matches the minimum acceptable amount determined by your slippage setting. | Ensure the trade executed efficiently and within your risk parameters. |
Conclusion
The decentralized ecosystem rewards efficiency. A basic understanding of DEXs allows you to participate, but mastering slippage control, leveraging advanced routing via aggregators, and skillfully managing gas fees transforms participation into profit.
By actively optimizing these three core components—price, path, and cost—you minimize hidden risks like front-running and dramatically reduce the true cost of every transaction. Start small by experimenting with custom gas settings and low slippage tolerance on smaller chains or during off-peak hours. As you gain confidence, you will evolve from a novice user merely hoping a swap succeeds, to a sophisticated DeFi trader executing transactions with precision and purpose.